Quick Start Guide
Build a flow that reads a CSV, keeps only the rows you want, and exports the result. Five steps, about five minutes.
This guide assumes you have a FileBender account. If you don’t, sign up at filebender.com — it’s free to start.
1. Create a flow
Section titled “1. Create a flow”From your dashboard, click Create Flow. You land in the canvas with a single empty flow titled “Untitled Flow”. Rename it now if you like — the title input is focused for you.
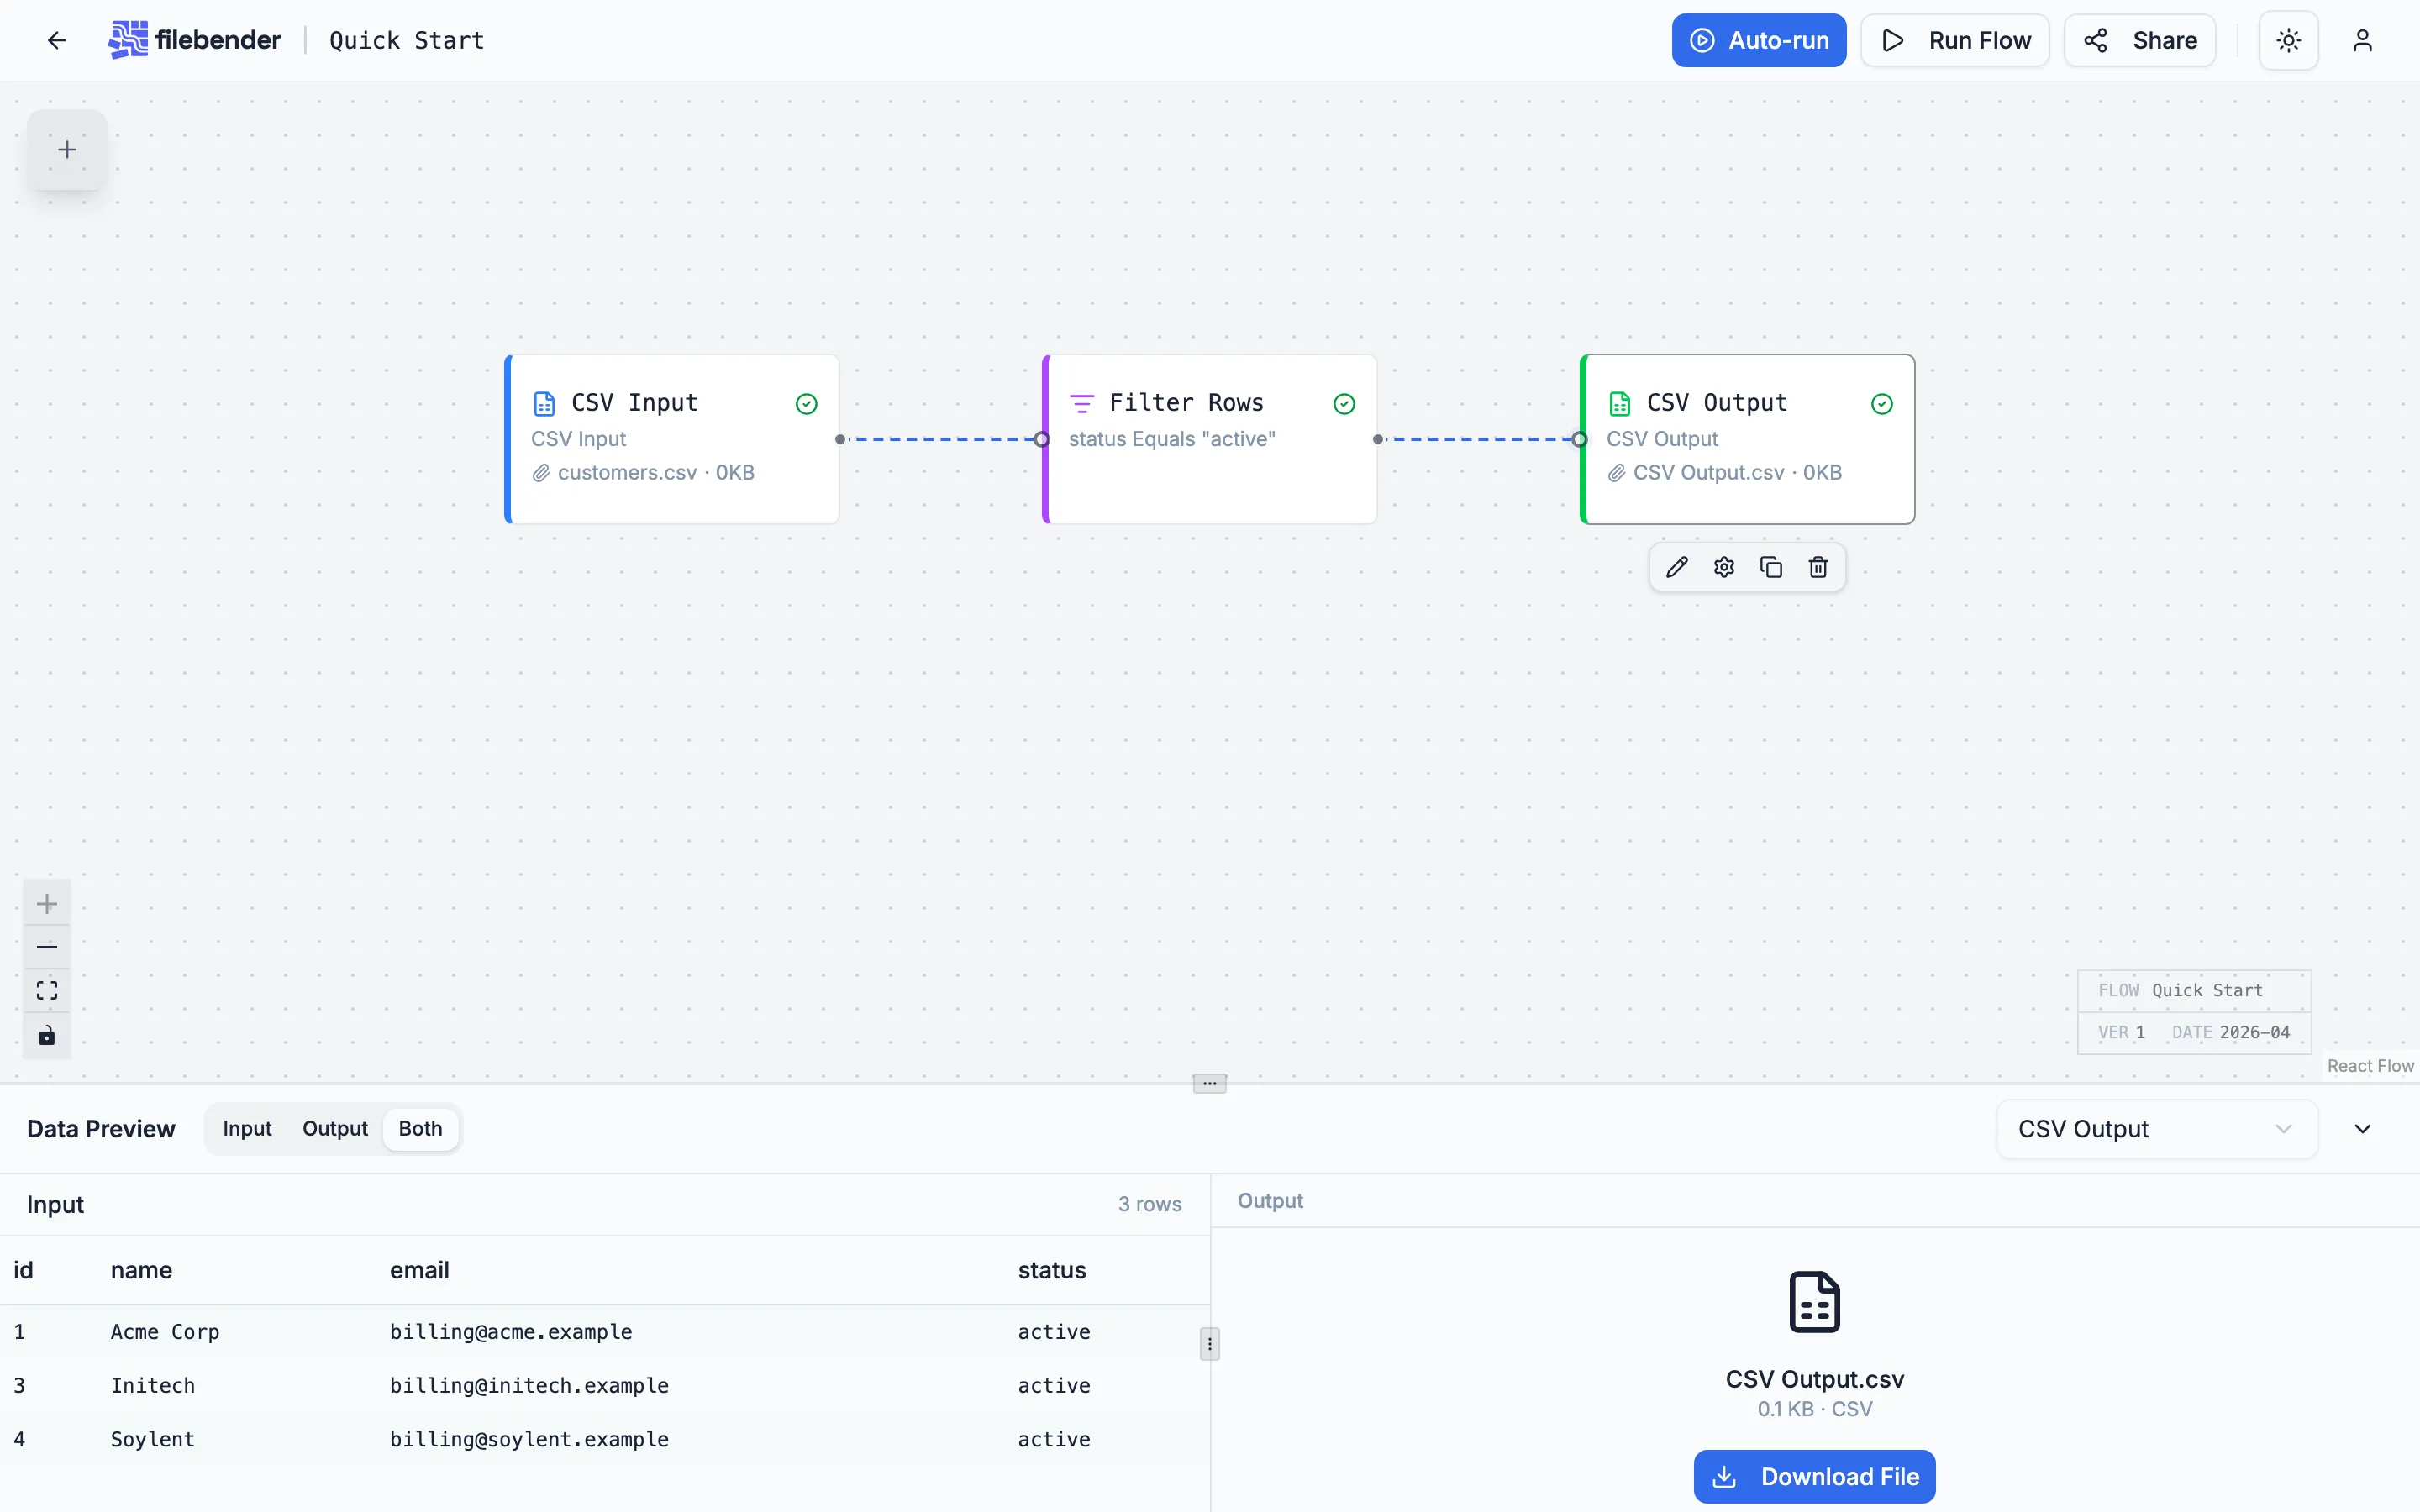
2. Add a CSV input
Section titled “2. Add a CSV input”Open the transform library (the panel on the left, or press Cmd+B) and drag a CSV Input node onto the canvas. CSV Input is in the Input category — its left border is blue.
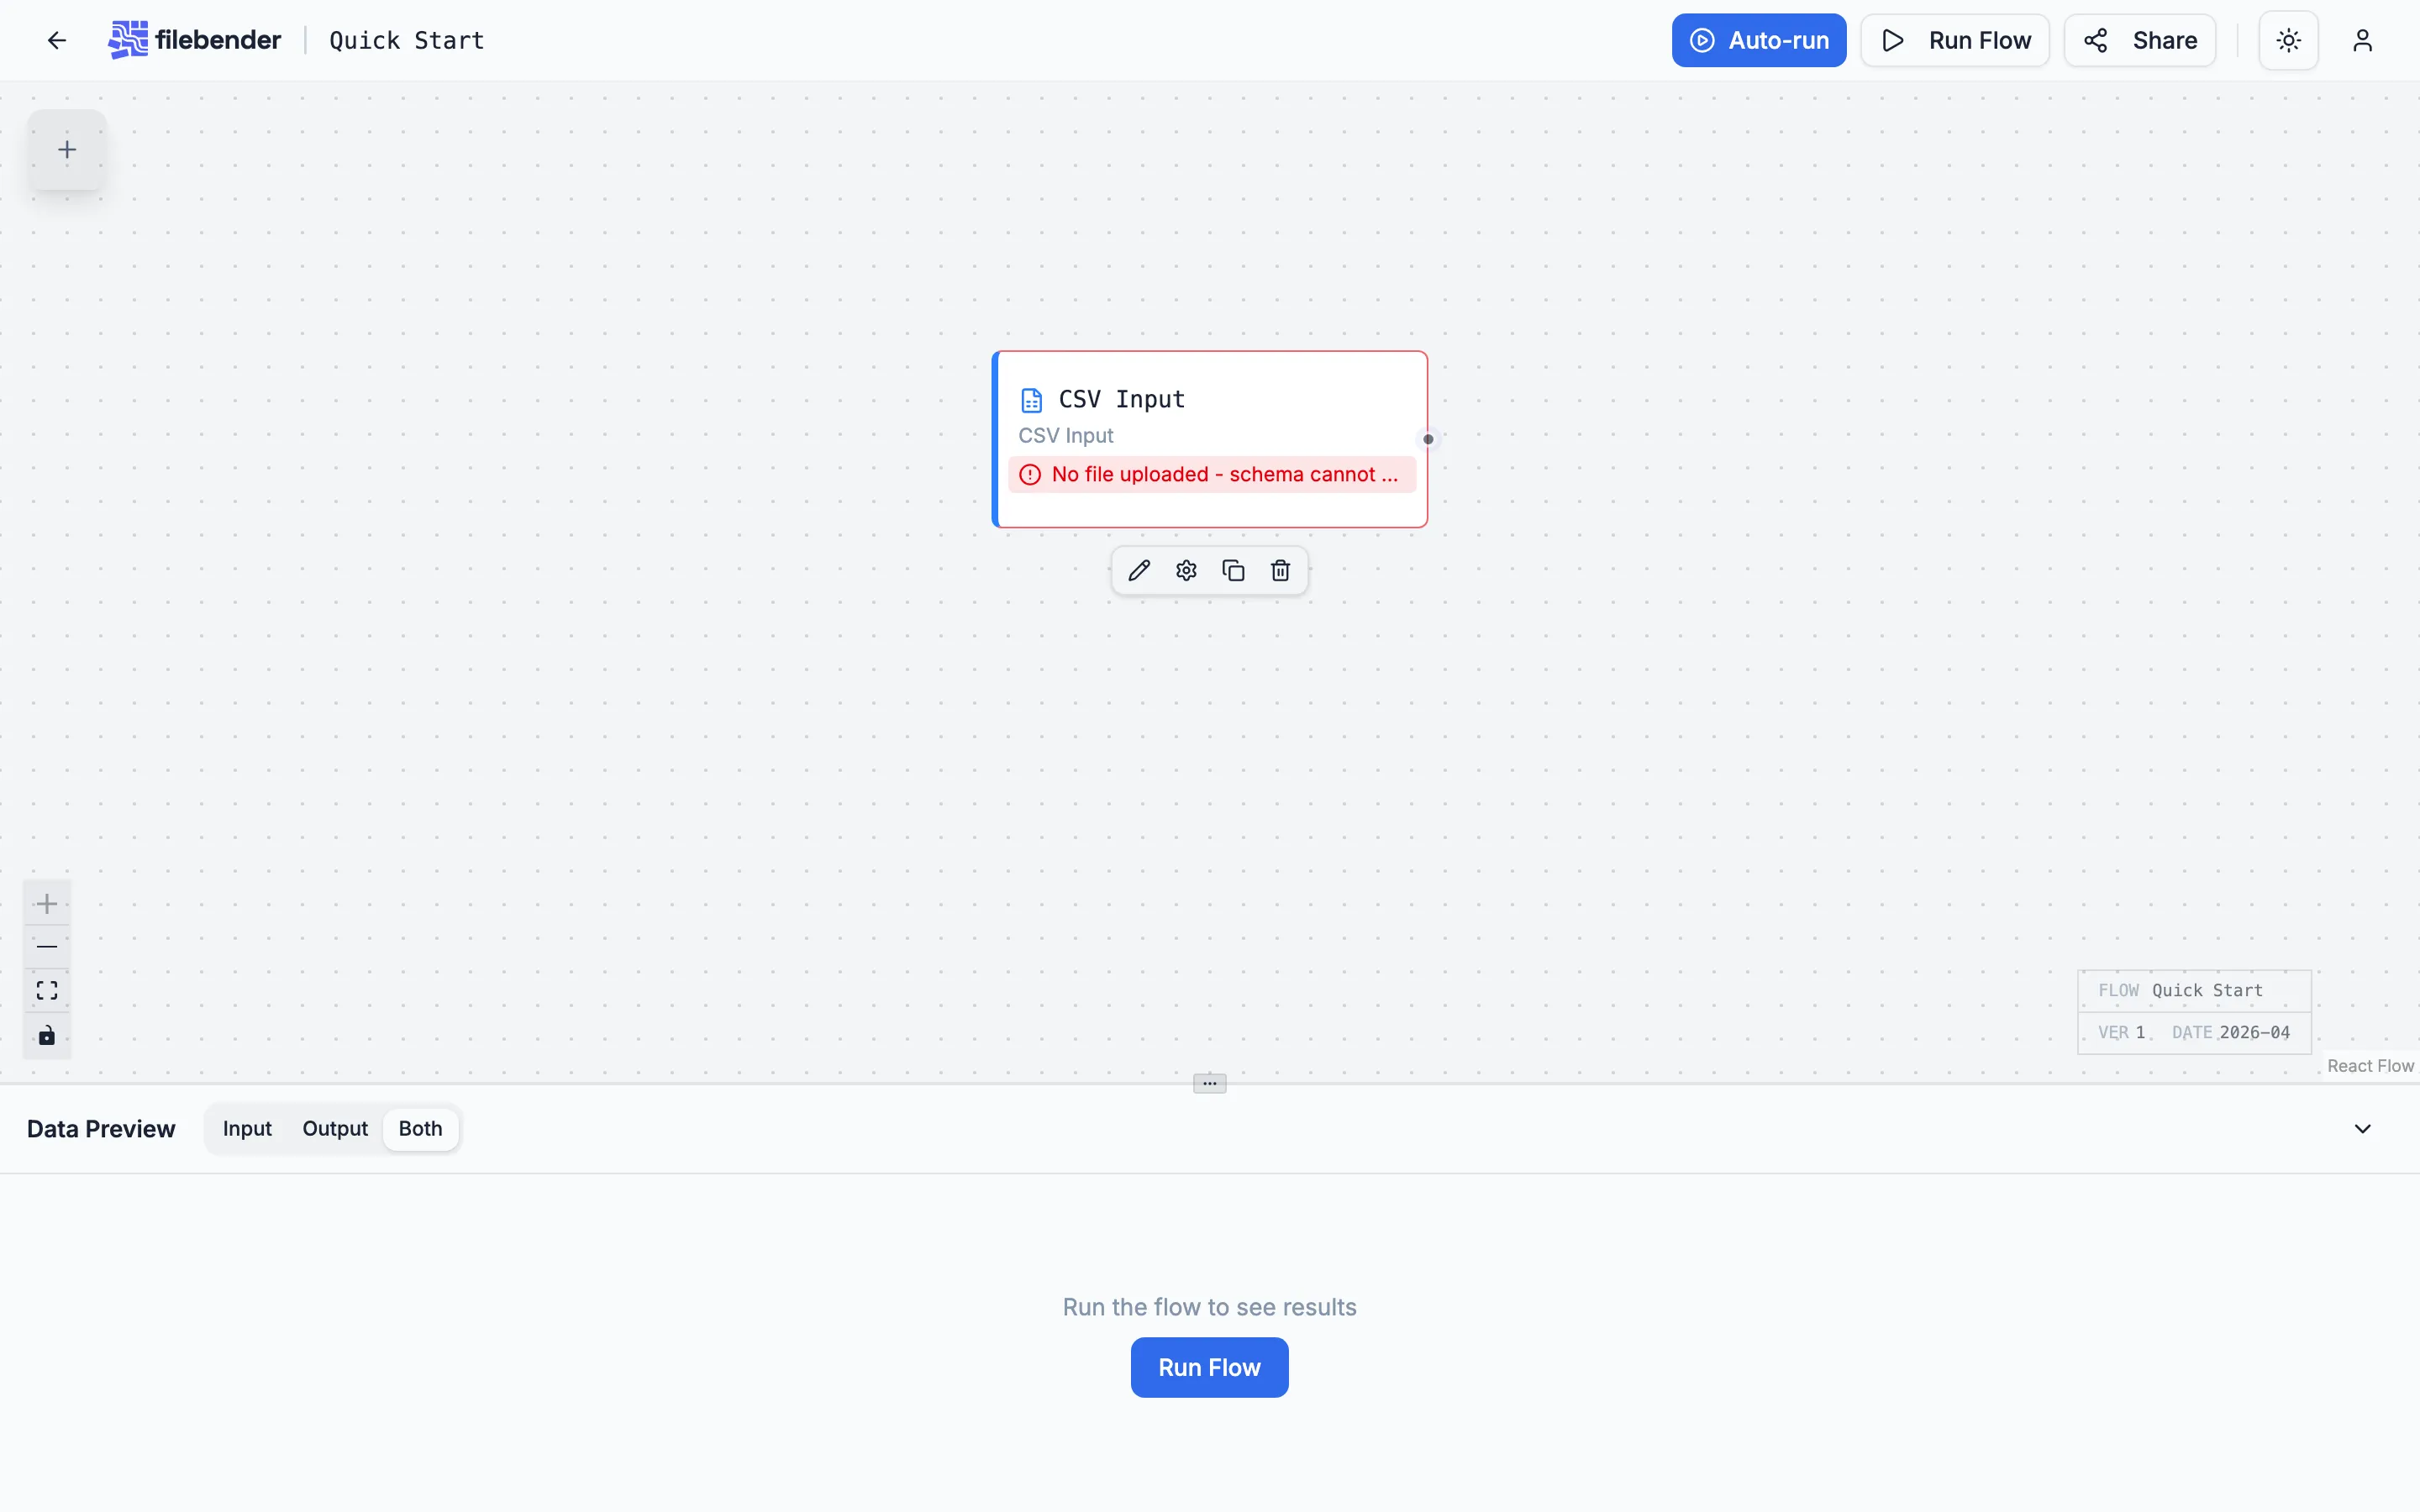
3. Drop in a CSV file
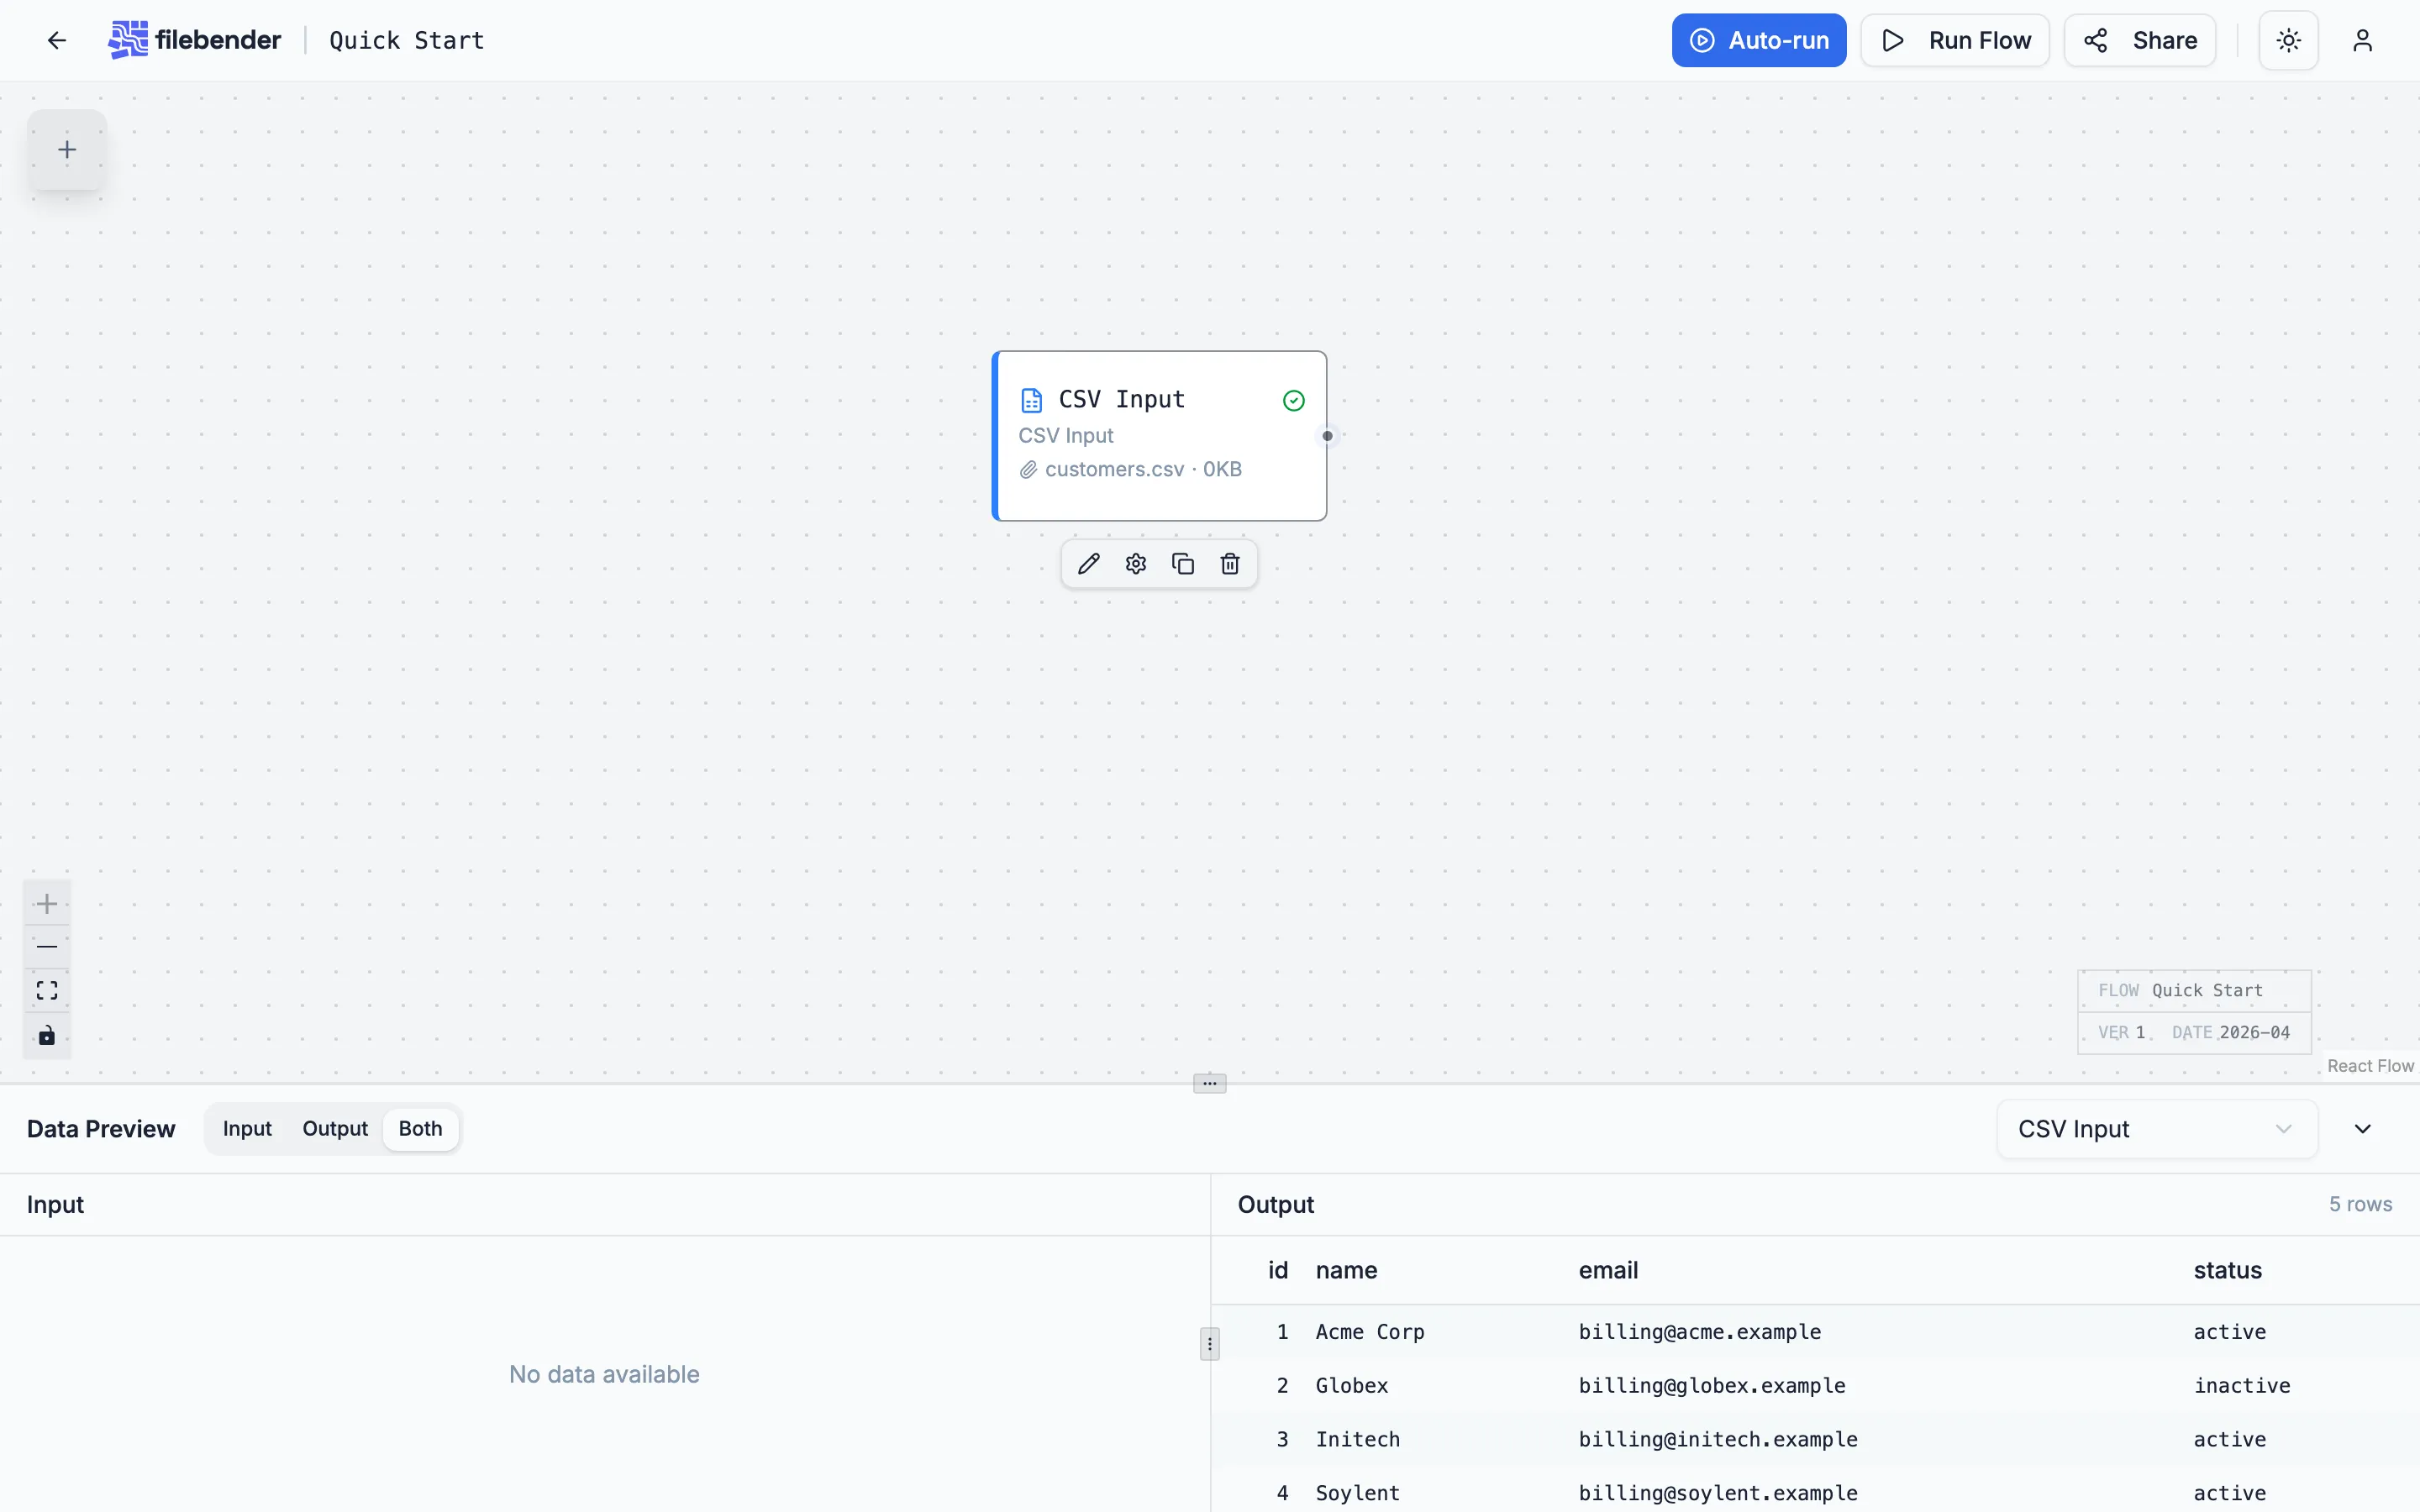
Section titled “3. Drop in a CSV file”Drag a CSV file from your computer onto the CSV Input node. FileBender parses it locally — no upload — and shows the schema and a preview underneath. If the parser detects a quoting or delimiter issue, you can adjust it in the node’s config dialog (click the gear icon).
4. Filter rows
Section titled “4. Filter rows”Drag a Filter Rows node from the transform library onto the canvas, then drag a connection from the CSV Input’s source handle to the Filter Rows’ target handle. Double-click the Filter Rows node to open its settings and add a condition — for example, status equals active.

Click Save Changes and run the flow. The preview updates to show only matching rows.
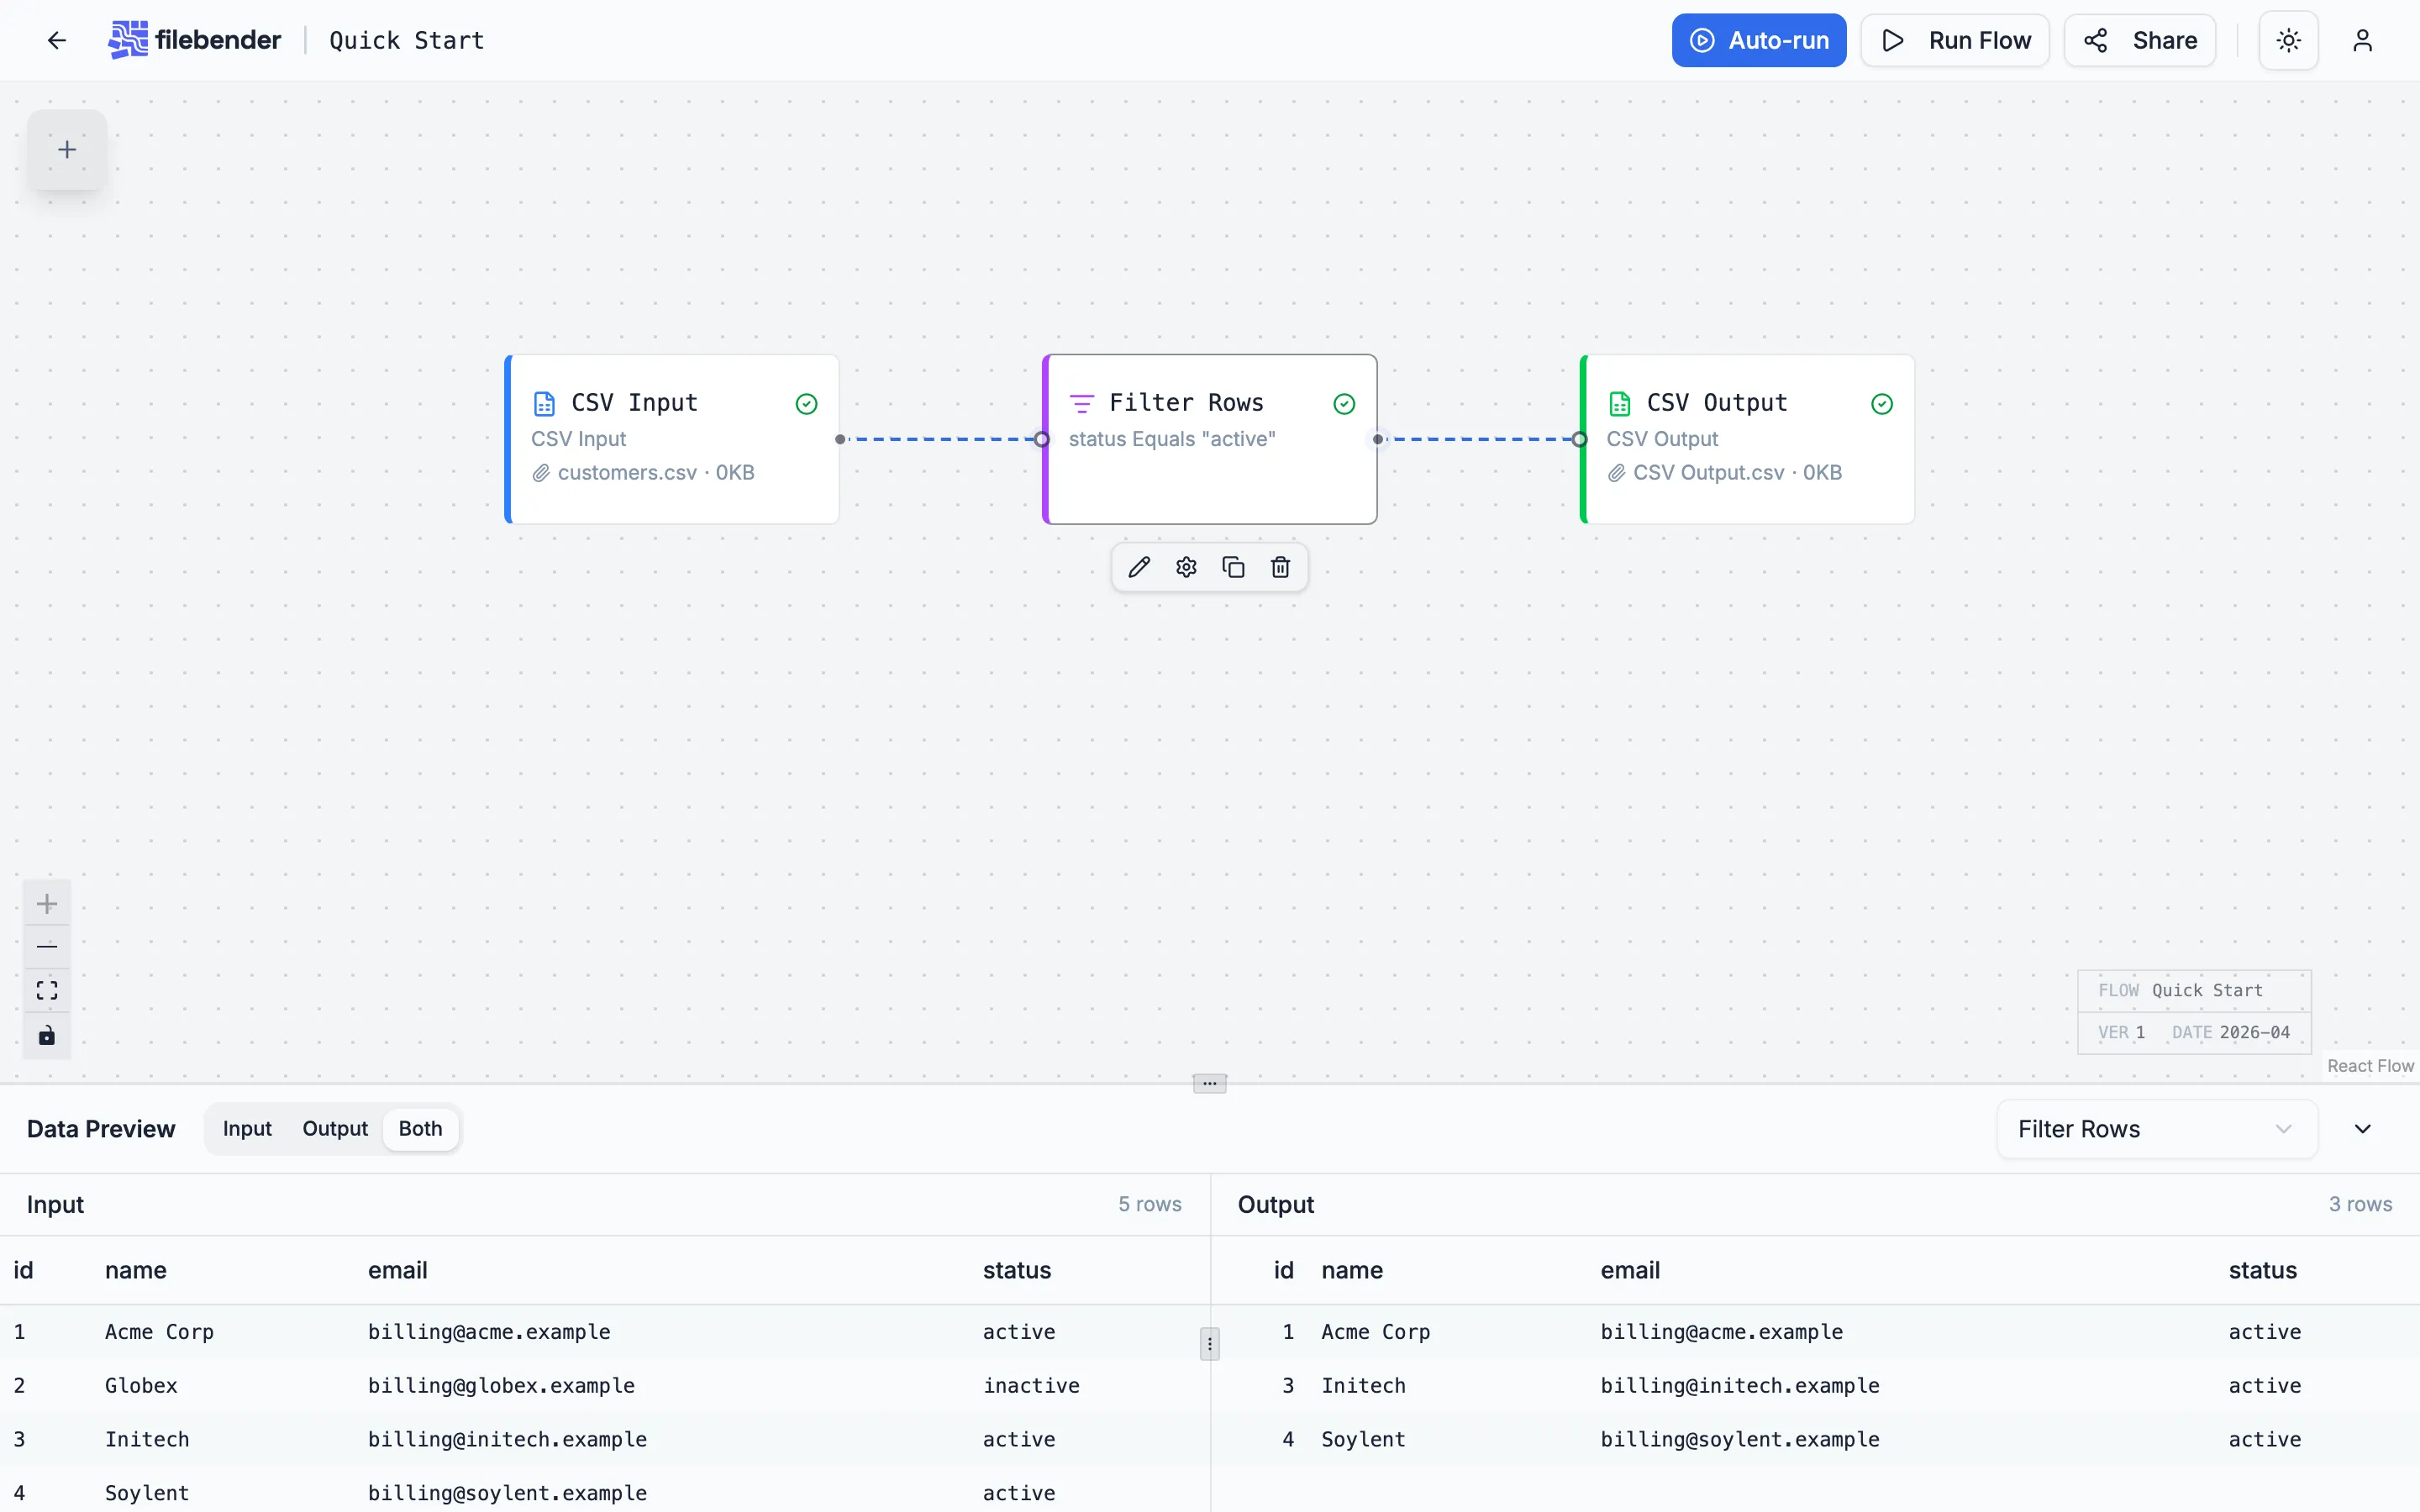
5. Export the result
Section titled “5. Export the result”Drag a CSV Output node onto the canvas, connect Filter Rows to it, and click Run. When execution finishes, the output node shows a download card — click it to save the filtered CSV.
That’s it. You’ve built and run a flow.
Next steps
Section titled “Next steps”- Learn the vocabulary in Core Concepts — flows, nodes, handles, categories, the privacy model, the execution model.
- Walk through a longer realistic example in Building Your First Flow.
- Browse the Transforms reference for every transform’s options, examples, and edge cases.